In this module you will mobilise Salesforce objects, ready for use with MobileCaddy. This will include specifying their CRUD settings.
We shall be mobilising the Accounts object for read-only use and the Contacts object with settings such that our application has the rights to create and update contact records too.
Our developer documentation further covers Mobilising Tables.
Step 1: Add the MC_Proxy_ID Field
The MC_Proxy_ID field needs to be added for each sObject that is to be mobilised by MobileCaddy. These instructions cover the steps to do this. Do the following for both the Accounts and Contacts.
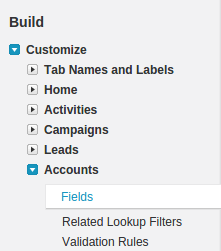
- Go to Setup and select the object you are going to mobilise from the left-hand Build -> Customize menu structure. In the below screenshot we are going to add the MC_Proxy_ID field to the Accounts object.
- Select the Fields menu item
- On the following page click the New button
- On the next (New Custom Field) page select the Text Area data type option, and click Next.
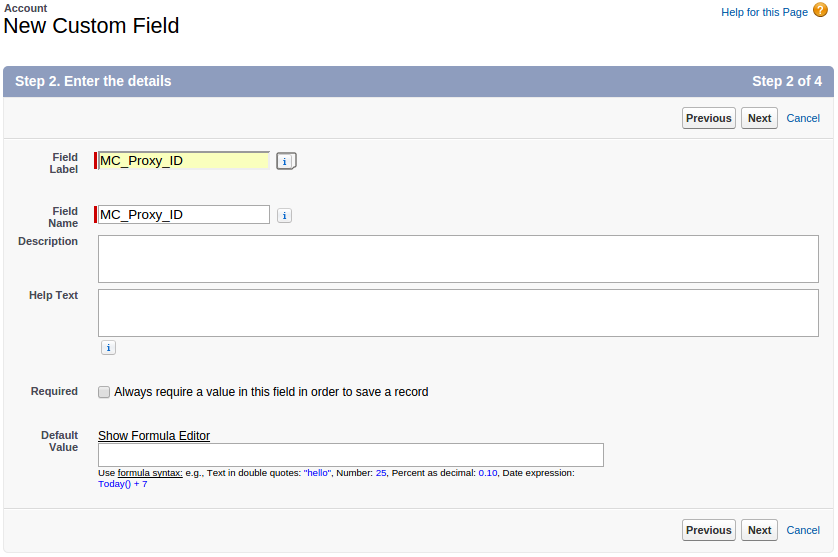
- On the next page (Step 2, Enter the Details) enter the value MC_Proxy_ID into the Field Label and Field Name boxes as per below, and click Next.
- On the next screen (Step 3. Establish field-level security) if you are in developer environment you can just accept the defaults, but in production it is good to ensure that any profiles for users who you are going to deploy mobile apps to have read/write access.
- On the following page (Step 4. Add to page layout) untick all options and click Save. You should now have successfully added the required MC_Proxy_ID field to the sObject.
Step 2 : Mobilise our Account Table
- From our Mobile Application detail screen (MobileCaddy App -> Mobile Applications tab -> “Accounts/Contact Explorer”) view the Dynamic Version record that it’s currently using. There is a Dynamic Version related list further down the page that allows you access to the Dynamic Version. Click on the current Dynamic Version to view the details.

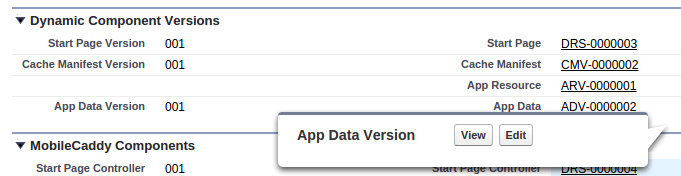
- On the Dynamic Version screen View the App Data Version for the Dynamic Component Versions
- When viewing the App Data Version record (e.g. ADV-0000001), click the Create New Mobile Table button. This will start the New Table wizard.
- Now specify the name of the object you want to mobilise. In this instance it is Account so enter that into the search box and click Seach sObjects.
- Select the Account object listed in the Existing Salesforce sObjects list.
- You now need to specify a name for your new table. Enter Account and click Continue.
- You now specify a Sync Type for your table. As we only require read-only access we specify Refresh Only. Do this and click Create Mobile Table.
- You now get to specify the fields that will be mobilised. In our case we are only interested in the Name and ID fields, and they have been auto-selected for us so we can click the Select Table Rows button without changing anything. For the Contacts table that we mobilise later we shall be adding extra fields to our mobilised table.
- The final step is to activate the mobile table. This is done by clicking on the Mobile Table record and clicking the Activate/Deactivate button.
Step 3 : Mobilise our Contact Table
- Repeat sub-steps 1-6 from Step 2 above for the Contact object
- You now specify a Sync Type for your table. Since we want to be able to create and update contact records on our device we need to specify the sync type to be Dynamic (Submit First/Retain).
- You now get to specify the fields that will be mobilised. We are going to select the following fields; For each field selected you also want to set CRUD settings for Create, Read and Update to Yes.
- Account ID
- First Name
- Last Name
- Mobile Phone
- Title
- Once these fields and their CRUD settings have been specified click Select Table Rows.
- The final step is to activate the mobile table. This is done by clicking on the Mobile Table record and clicking the Activate/Deactivate button.