In this module you shall create your base Ionic application from the MobileCaddy Shell App repository. You will set some base configuration and run this up in the Codeflow environment and note how it authenticates with the SFDC and the application that you previously configured on the platform.
Step1 : Setup the local application
This step uses the MobileCaddy CLI tool to create a project using the Ionic Shell project template. If you haven’t already installed the MobileCaddy CLI package this can be done with this command;
|
1 2 3 |
npm install -g mobilecaddy |
Note: If you want to use pre-written app repo then clone the repository at https://github.com/MobileCaddy/tutorial-ionic-contact-explorer.
- Create a new MobileCaddy project with the template mentioned above. We will call our project myApp.
12345678mobilecaddy new ionic-shell myApp// if you are on a Mac or Linux you may need to use// the --sudo flag like this;// mobilecaddy new ionic-shell myApp --sudo
This step will create our application structure in the myApp directory and will install all the application and workflow dependencies needed.
Step 2 : Configure your App
We now want to set a few configuration items up in our project. This will enable our local app to target the correct Mobile Application record on SFDC for when we run our app up and also for when we deploy updates to the platform.
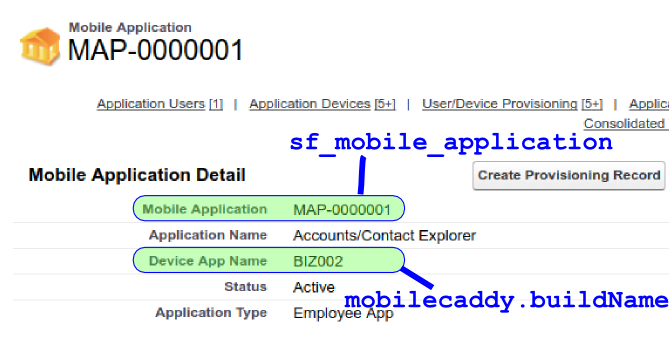
- Modify the www/index.tpl.html file to point to our BIZ002 application by modifying the mobilecaddy.buildName value.
123mobileCaddy.buildName = 'BIZ002'; - In the ~/package.json file set the sf_app_name config item to be “MC_ContactsExplorer”
123"sf_app_name" : "MC_ContactsExplorer", - In the ~/package.json file set the sf_mobile_application config item to match the Mobile Application as per the Mobile Application record detail screen on Salesforce
123"sf_app_name" : "MAP-0000001",
Step 3 : Start our App
We now have everything installed to allow us to run our app locally. This will cause an authentication to Salesforce.com. Once authenticated we should be able to navigate around the shell application.
- cd back into the myApp directory and run the following command to start our app on a local web server. This command should open up a new browser tab for you, with our app running inside.
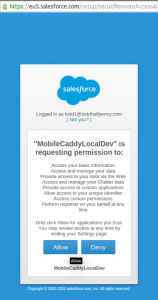
123mobilecaddy serve - You should see a Salesforce authentication popup (note you may need to unblock pop-ups if you have them blocked). Once you enter your developer account details you should then be asked to allow the MobileCaddyLocalDev application permission to access your account. Click Allow.
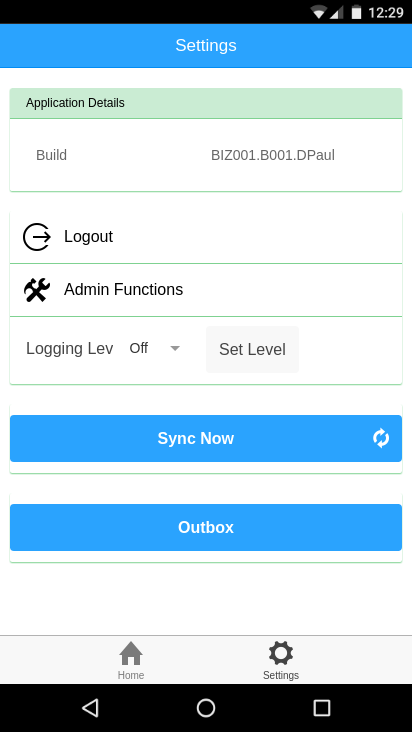
- You will now be redirected to your local app… this will now be building it’s internal DB structure. Once complete (should take < 10 seconds) you should be present with the following screen. This is the main Settings tab of you application.