In this module we will add the relevant HTML and JavaScript to our application to create a tab that shows a list of Accounts. We will also make this tab the default screen upon startup.
This module will introduce us to the MobileCaddy devUtils API and it’s smartSql and logger functions.
As we started the app using the MobileCaddy CLI command mobilecaddy serve, a task is automatically started to watch our directory for changes to SCSS, JS and HTML files. This terminal output will be useful for picking up JavaScript syntax errors and other helpful things.
Step 1 : Create a template for listing accounts
- Create a new file called accounts.html in the www/templates directory
- Add the following content ionic content to give us a basic page structure. This includes a ion-nav-buttons tag that gives us an area in the navigation bar (at the top of the screen) where we can place some icons and buttons. We then place the MobileCaddy provided directive mc-sync-spinner in there. This will give us an icon in the top bar that will let us know if our app is connected to a network, and if a synchronisation is in process.
12345678910111213<ion-view title="Accounts"><!-- Output a connectivity/sync-icon in the top right of our navigation bar --><ion-nav-buttons side="right"><mc-sync-spinner></mc-sync-spinner></ion-nav-buttons><ion-content></ion-content></ion-view> - To render the list of accounts we are going to use the Ionic collection-repeat directive. Using this will output an ion-item entry for each item in our vm.accounts variable. vm.accounts is bound to the accounts attribute of our vm object that our JavaScript will instantiate, and we will see how this is populated further down this tutorial.
1234567891011<ion-list><ion-item class="item"collection-repeat="account in vm.accounts" type="item-text-wrap"><h3>{{account.Name}}</h3></ion-item></ion-list>
Step 2: Add an Accounts tab and Routing
Our Angular Ionic application will have a tabbed interface and uses states to maintain knowledge of the current page within each tab.
- Our tabs are defined in the ~/templates/tabsMain.html file. Modify the file, replacing the ‘Home’ tab (“ion-tab title=”Home”…) with the following:
123456<!-- Accounts Tab --><ion-tab title="Accounts" icon="icon ion-home" href="#/tab/accounts"><ion-nav-view name="accounts-tab"></ion-nav-view></ion-tab> - To enable navigation/routing throughout our app we use the AngularUI Router. To enable our Accounts tab we need to replace the existing routing code for our Home tab.Add a state to the routing information in www/js/app.js. To do this add the following highlighted lines to the file to add another state, and remove those associated with the tab.home.
What we’re doing here is setting up a routing configuration for the URL /accounts. When our application navigates to this route we will use the template defined.
71727374757677787980818283848586878889909192939495.config(['$stateProvider', '$urlRouterProvider', function($stateProvider, $urlRouterProvider) {// Ionic uses AngularUI Router which uses the concept of states// Learn more here: https://github.com/angular-ui/ui-router// Set up the various states which the app can be in.// Each state's controller can be found in controllers.js$stateProvider// setup an abstract state for the tabs directive.state('tab', {url: "/tab",abstract: true,templateUrl: RESOURCE_ROOT + 'templates/tabsMain.html'})// the account tab has its own child nav-view and history.state('tab.accounts', {url: '/accounts',views: {'accounts-tab': {templateUrl: RESOURCE_ROOT + 'templates/accounts.html',}}}) - You also want to make this new tab our default. Modify the line that handles the $stateProvider.otherwise like this:
187188189$urlRouterProvider.otherwise('/tab/accounts');
Step 3 : Add our Controller
Above we created our view for the accounts listing, and now we need to create the controller that will be used to populate the scope based upon the data our app receives from SFDC.
- Update our app.js to add a controller to the state definition for our /accounts route. Add the following highlighted lines to define the Angular controller we shall use (and note the added coma on the previous line). Note we are choosing to use Angular’s Controller As syntax, and there’s a great blog post here by John Papa on it.
19202122232425262728293031// the account tab has its own child nav-view and history.state('tab.accounts', {url: '/accounts',views: {'accounts-tab': {templateUrl: RESOURCE_ROOT + 'templates/accounts.html',controller: 'AccountsCtrl',controllerAs: 'vm'}}}) - Create a new file in the www/js/controllers directory called accounts.controller.js
- Add the following content to our new file.
34567891011121314151617181920212223242526272829303132333435363738394041424344454647484950515253545556575859606162636465666768697071727374757677787980818283848586878889909192939495/*** Accounts Controller** @description description*/(function() {'use strict';angular.module('starter.controllers').controller('AccountsCtrl', AccountsCtrl);AccountsCtrl.$inject = ['$scope', '$ionicLoading', 'logger', 'AccountsService'];function AccountsCtrl($scope, $ionicLoading, logger, AccountsService) {// unhide our nav bar (element defined in index.html)// No need to pay too much notice, we just need to do this in the first// controller we come to, since we a re manully bootstrapping angular/ionicvar e = document.getElementById('my-nav-bar');angular.element(e).removeClass( "mc-hide" );var vm = this,logTag = "AccountsCtrl";activate();/*** @function activate* @description Activates our view.* @return {[type]} [description]*/function activate() {// Start a loading spinner$ionicLoading.show({template: '<p>Fetching accounts...</p><ion-spinner/>',animation: 'fade-in',showBackdrop: true,duration: 3000,delay : 400});// Attempt to get our accountsfetchAccounts();}/*** @function fetchAccounts* @description Fetches all the accounts and applies them to our vm*/function fetchAccounts(){// Make a call to our AccountsService to get all the accounts. This service// makes use of JavaScript promisesAccountsService.all().then(function(accounts){// We have our accounts - so assign them so our template can use themvm.accounts = accounts;$ionicLoading.hide();}).catch(function(e){// If we haven't yet finished the initial load of data from Salesforce// our service rejects with "sync-not-complete".if (e != "sync-not-complete") {// We have an unknown response - so we log it using the MobileCaddy// logger API. This log will be sent to our Salesforce backendlogger.error(logTag, e);}});}// Handle events fired from the SyncService (that is part of the shell code)var deregisterHandleSyncTables = $scope.$on('syncTables', function(event, args) {if (args.result.toString() == "InitialLoadComplete") {// We have been told our initial sync is now complete. We can now safely// fetch our data from our servicefetchAccounts();}});// Handles $destroy event - cleans some listeners etc up$scope.$on('$destroy', function() {// We need to deregister our $scope.on to remove memory leak.deregisterHandleSyncTables();});}})();
The above is the full controller code, and there are a few things in there, so let’s step through those that are not part of the standard angular controller code.
In the main body of code, one of the first things we’ve done in set up a variable vm to represent the binding scope. This, along with the Controller As syntax in the app.js (or templates, as we will see later) allows me to use code such as vm.accounts in my templates to access the scope of the related controller.
Following that, I call activate(); This is a standard approach that this tutorial uses, and helps me know the flow of my code when my controllers is instantiated. Next up the activate function is defined. In the activate function we show a loading dialogue using the ionicLoading directive, and we then call fetchAccounts().
|
1 2 3 4 5 6 7 8 9 10 11 12 13 14 15 |
function activate() { // Start a loading spinner $ionicLoading.show({ template: '<p>Fetching accounts...</p><ion-spinner/>', animation: 'fade-in', showBackdrop: true, duration: 3000, delay : 400 }); // Attempt to get our accounts fetchAccounts(); } |
In the fetchAccounts function we in-turn call our AccountsService to get all our account records. This call, just like many others in our tutorial use JavaScript promises, and in this case I know that if it resolves then it shall resolve to an array of account objects. Once we have these we assign them to vm.accounts, and as such they can be rendered by our accounts.html template that we implemented earlier. We also call hide on our loading dialogue to free up our UI for the user.
|
1 2 3 4 5 6 7 8 9 10 11 12 13 14 15 16 17 18 19 |
function fetchAccounts(){ // Make a call to our AccountsService to get all the accounts. This service // makes use of JavaScript promises AccountsService.all().then(function(accounts){ // We have our accounts - so assign them so our template can use them vm.accounts = accounts; $ionicLoading.hide(); }).catch(function(e){ // If we haven't yet finished the initial load of data from Salesforce // our service rejects with "sync-not-complete". if (e != "sync-not-complete") { // We have an unknown response - so we log it using the MobileCaddy // logger API. This log will be sent to our Salesforce backend logger.error(logTag, e); } }); } |
It should be noted here that since this is the first screen our user will see, and that MobileCaddy apps are written with an offline-first approach, that we choose to lock the UI upon first run up. We do this by rejecting the call to the AccountService.all() function with a dedicated response “sync-not-complete” if our service knows that data is still being retrieved from Salesforce. If our controller sees this response it knows that it should not hide the loading dialogue.
If we do see a reject from our service, and it isn’t “sync-not-complete”, then we use the MobileCaddy logger.error call to log our error. Using this will log our error to the console, but will also store the entry in an internal table called Mobile_Log__mc and the records will be sent to the Salesforce platform upon our next synchronisation. This is useful for admins and developers during live roll-outs and production use.
The are two more chunks to our code, let’s take a look at them;
The first sets up our controller to listen for a syncTables event on our scope. And when we receive it we check the contents to see if it contains the result “InitialLoadComplete”. If we see this then we call the fetchAccounts function again to attempt to read our accounts from the service and apply the results to our view. The use of this syncTables event is another standard pattern we take in MobileCaddy apps. The built in SyncService is responsible for handling the calls to the MobileCaddy library to make sync requests for tables against the Salesforce platform. Our SyncService will broadcast a “InitialLoadComplete” message once it believes that our intial synchronisation has taken place. And thus our controller knows that if it sees this then it is able to free up the UI and our app is ready to run in full offline mode.
|
1 2 3 4 5 6 7 8 9 10 |
// Handle events fired from the SyncService (that is part of the shell code) var deregisterHandleSyncTables = $scope.$on('syncTables', function(event, args) { if (args.result.toString() == "InitialLoadComplete") { // We have been told our initial sync is now complete. We can now safely // fetch our data from our service fetchAccounts(); } }); |
The last piece of code in our controller handle the destroy event, and it’s job is to de-register our scope listeners. If we were not to do this then we’d have a potential memory leak in our code.
|
1 2 3 4 5 6 7 |
// Handles $destroy event - cleans some listeners etc up $scope.$on('$destroy', function() { // We need to deregister our $scope.on to remove memory leak. deregisterHandleSyncTables(); }); |
Step 4 : Add our service
The controller you wrote in step 3 included calls to an AccountService, We shall implement that now. This service will make use of our MobileCaddy devUtils API.
Firstly create a new file called account.service.js in your www/js/services directory.
Add the following to it;
|
1 2 3 4 5 6 7 8 9 10 11 12 13 14 15 16 17 18 19 20 21 22 23 24 25 26 27 28 29 30 31 32 33 34 35 36 37 38 39 40 41 42 43 44 45 46 47 48 49 50 51 52 53 |
/** * Accounts Factory * * @description description */ (function() { 'use strict'; angular .module('starter.services') .factory('AccountsService', AccountsService); AccountsService.$inject = ['devUtils', 'logger', 'UserService']; function AccountsService(devUtils, logger, UserService) { return { all: all }; /** * @description Gets a list of accounts. * @return {promise} - resolves to an array of records or rejects. * rejects "sync-not-complete" | errorObj */ function all() { return new Promise(function(resolve, reject) { devUtils.readRecords('Account__ap', []).then(function(resObject) { if (resObject.records.length > 0) { resolve(resObject.records); } else { // If we have 0 length records then check to see if our initial sync // has been completed yet return UserService.hasDoneProcess("initialDataLoaded"); } }).then(function(hasDoneProcessRes){ if (hasDoneProcessRes) { resolve([]); } else { // Reject with "sync-not-complete" so our controller knows that the // initialSync is still underway, so can't keep the UI locked reject("sync-not-complete"); } }).catch(function(resObject){ reject(resObject); }); }); } } })(); |
This is the first version of our service and it exposes one function called all which returns a JavaScript promise that resolves to an array of Account objects. It could also send a reject, and in which case it could either due to an error, or perhaps if our service believes that our application is still undertaking it’s initial synchronisation of data.
How our service does this is by attempting to read records from the Account__ap table using the MobileCaddy devUtils API. If the result of that call is an empty array (i.e. no accounts) then our service next attempts to call our UserService and asks it if the process initialDataLoaded has been completed. We don’t need to worry about the implementation of the UserService itself (although the code is all there to be seen) but just to know that if the result of this call is true then our app has completed it’s initial synchronisation with the Salesforce platform.
Step 5 : Configure our Initial Synchronisation
Our shell code includes the functionality to request a call to the SyncService.initialSync() upon the very first run-up of the app – code for this can be found in the app.js. Within our SyncService – implemented in our services/sync.service.js file – there are 2 variables setup that define lists of tables (and settings) to be used for synchronisation calls. Our shell app has this code, at present;
|
1 2 3 4 5 6 7 8 9 10 11 |
// This is where you put your list of tables that you want from the platform var appTables = [ {'Name': 'myDummyTable1__ap', 'syncWithoutLocalUpdates': true, 'maxTableAge' : fourHours}, {'Name': 'myDummyTable2__ap', 'syncWithoutLocalUpdates': true, 'maxTableAge' : fourHours} ]; var appTablesSyncNow = [ {'Name': 'myDummyTable1__ap', 'syncWithoutLocalUpdates': true, 'maxTableAge' : 0} ]; |
We now need to replace this dummy code with something that represents our application. The following updates the config to use the name of the table that we mobilised for our accounts object.
|
1 2 3 4 5 6 7 8 9 10 |
// This is where you put your list of tables that you want from the platform var appTables = [ {'Name': 'Account__ap', 'syncWithoutLocalUpdates': true, 'maxTableAge' : fourHours} ]; var appTablesSyncNow = [ {'Name': 'Account__ap', 'syncWithoutLocalUpdates': true, 'maxTableAge' : fourHours} ]; |
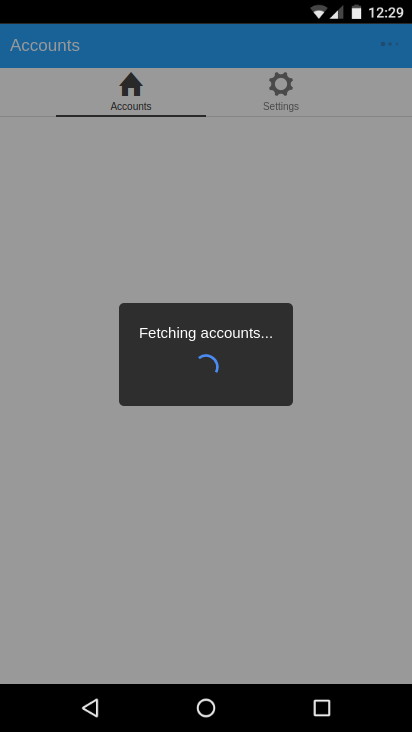
If you now refresh the app you should see that we see our spinning Fetching Accounts loading notification.
And once the synchronisation is complete, you should see a list of accounts. Note the cloud icon in the top bar, this represents that our app is online and that no sync is currently in process.
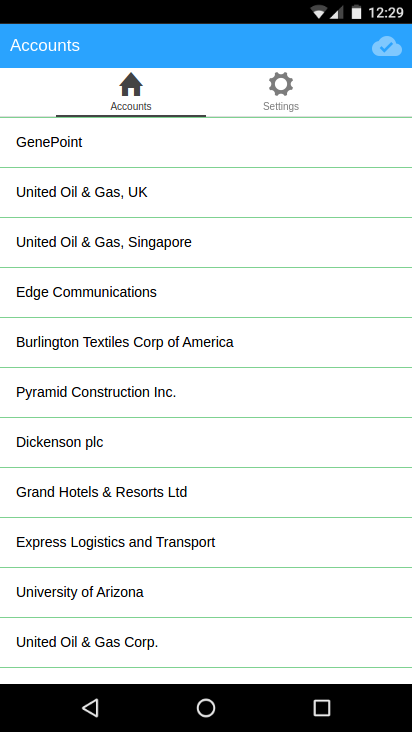
This list of accounts is available offline, so why not unplug your internet or turn off your wifi and reload the app?