Tables can be mobilised for different versions of our applications. This is done against the App Data version of the Dynamic Version.
Instructions to do this can be found below, or alternatively check-out our Quick Byte video that covers it.

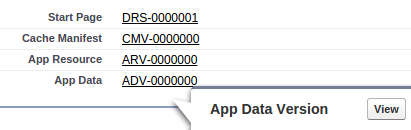
To mobilise a table, view the App Data Version for the Dynamic Version that we are interested in by clicking on the App Data link in the Dynamic Component Versions section.
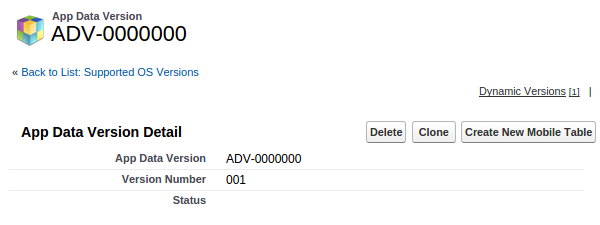
If the version is in the Developing state then we shall be given the option to Create New Mobile Table.
sObject Selection
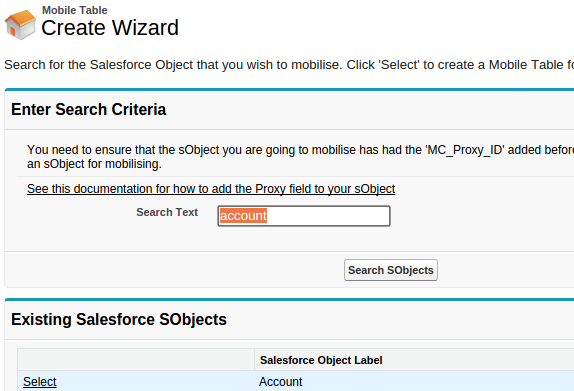
Clicking this kicks off the Mobile Table – Create Wizard. The option to search for the sObjects that are available to be mobilised shall be displayed. Not all sObjects will be available for mobilising. All matching entries shall be displayed along with their status.
If the sObject is available to be mobilised then the Select option shall be available.
Naming our Table
We will be given a default option and this can accepted. However if you have already created a table from this sObject you will need to change this to something unique (note it is possible to create more than one mobile table from a single sObject)
Table Sync Types
Once the name has been selected you will be prompted to select one of three Sync types;
- Refresh Only – This option is a one way sync from the Platform to the device. You will not be able to update records on the device and sync back to the platform. Use this option for read only data.
- Submit Only – This is a one way sync from the device to the platform. The device will not ‘pull down/refresh’ any data from the platform. Use this when you want to add data to the device but do not want any data from the platform.
- Dynamic (Submit First/Retain) – This is a two way sync or dynamic table. When you call sync on this table it will first submit any new or updated records the device to the platform and the refresh records from the platform back down to the device.
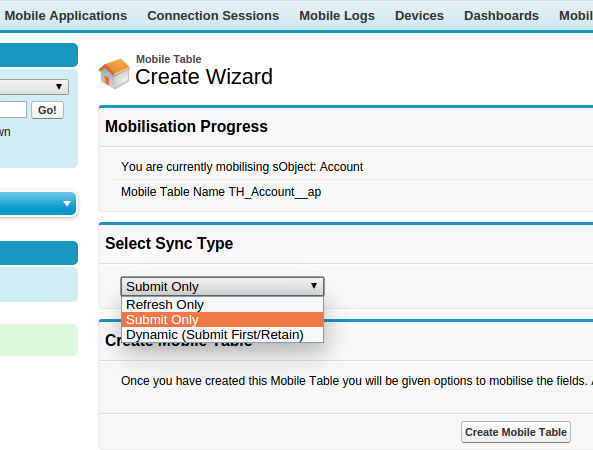
Table Fields
The last task is to select the fields to be mobilised in the new table and their respective Application CRUD and Conflict Resolution settings.
This page shows several sections;
- Available Salesforce sObject Fields (Must have) – These are mandatory fields.
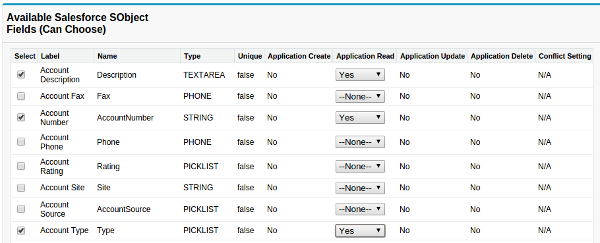
- Available Salesforce sObject Fields (Can choose) – These are extra fields available in the sObject that can be mobilised in our table
- Unavailable Salesforce sObject Fields – The fields are not available (currently) to be mobilised.
For all the selected Can Choose fields we must specify the CRUD settings.
The CRUD setting state whether or not the application can perform Create, Read, Update and Delete actions upon the fields. For example, as in the following screenshot, we could set the Account Number field to be Read-only. This will mean that if a developer tried to update the record on the device and also tried to specify a new value for the Account Number field then the MobileCaddy API will return an error. This error occurs on the device, meaning our rules are adhered to even if the device is offline.
Once everything looks how we want it we can click the Create Table Rows button and our new table, along with it’s fields and settings, is now all set up.
The final stage is to active the table via the Active button. In activating the table the fields shall all be validated to make sure that everything this is needed has been supplied.

Once activated the table will be ready for us to use in the Platform Emulator or to be pulled down to our clients once they hit the Dynamic Version associated with this particular App Data Version.