The MC_Proxy_ID field needs to be added for each sObject that is to be mobilised by MobileCaddy. These instructions cover the steps to do this.
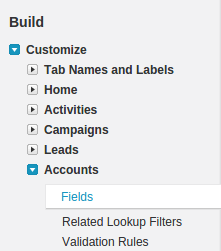
- Go to Setup and select the object you are going to mobilise from the left-hand Build -> Customize menu structure. In the below screenshot we are going to add the MC_Proxy_ID field to the Accounts object.
- Select the Fields menu item
- On the following page click the New button
- On the next (New Custom Field) page select the Text Area data type option, and click Next.
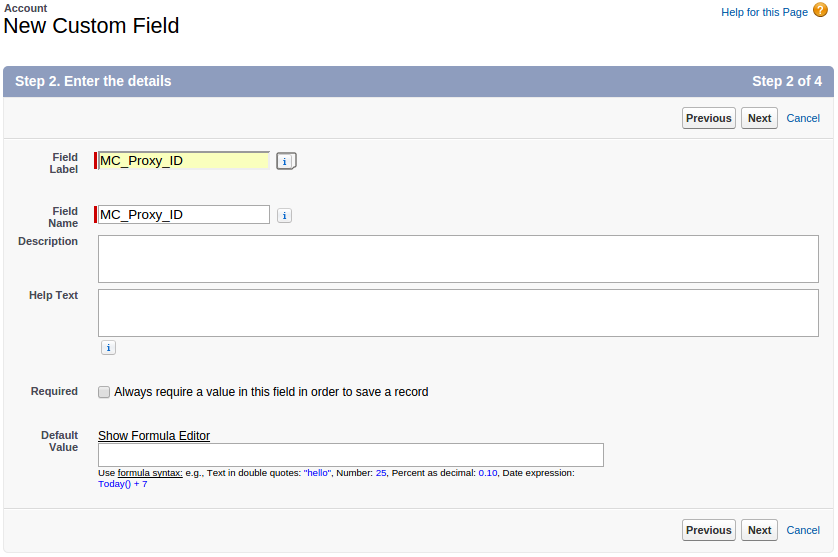
- On the next page (Step 2, Enter the Details) enter the value MC_Proxy_ID into the Field Label and Field Name boxes as per below, and click Next.
- On the next screen (Step 3. Establish field-level security) if you are in developer environment you can just accept the defaults, but in production it is good to ensure that any profiles for users who you are going to deploy mobile apps to have read/write access.
- On the following page (Step 4. Add to page layout) untick all options and click Save. You should now have successfully added the required MC_Proxy_ID field to the sObject.